Getting started with Retriever is quick and easy,
but if you run into any problems, please call us at 888-817-2817.
Installation video
Watch this video to get started, or check out the full installation guide below.
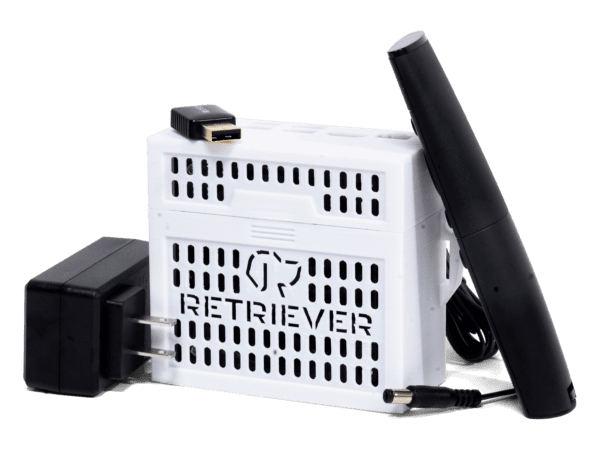
Included equipment
- Retriever device
- HDMI cable
- Wi-Fi dongle
- Power cord
- Retriever remote
If you have multiple Retriever players, make sure you have the correct Retriever for each location. Each box is labeled with the intended location. Please verify the label on the box matches the label on the player.
Step One
Connect the Retriever to your TV
- Connect the Retriever to your TV with an HDMI cable.
- Insert the Wi-Fi dongle into one of the USB ports.
- Plug the power cord into the device and an outlet.
- Power on the TV and select the correct input.

Step Two
Connect to the Internet
The first time you start the Retriever, it will probably be offline. You should see a blue Wi-Fi screen.
- Use the Retriever remote to select your Wi-Fi network.
- Use the onscreen keyboard to enter the network password.
Other connection options
Step Three
Verify the Retriever is online
- On your computer/tablet/smartphone, go to app.retrieverdigitalsignage.com
- Log in with your email address and password.
- Click on Devices in the navigation menu.
- Locate your device and verify that it is connected.
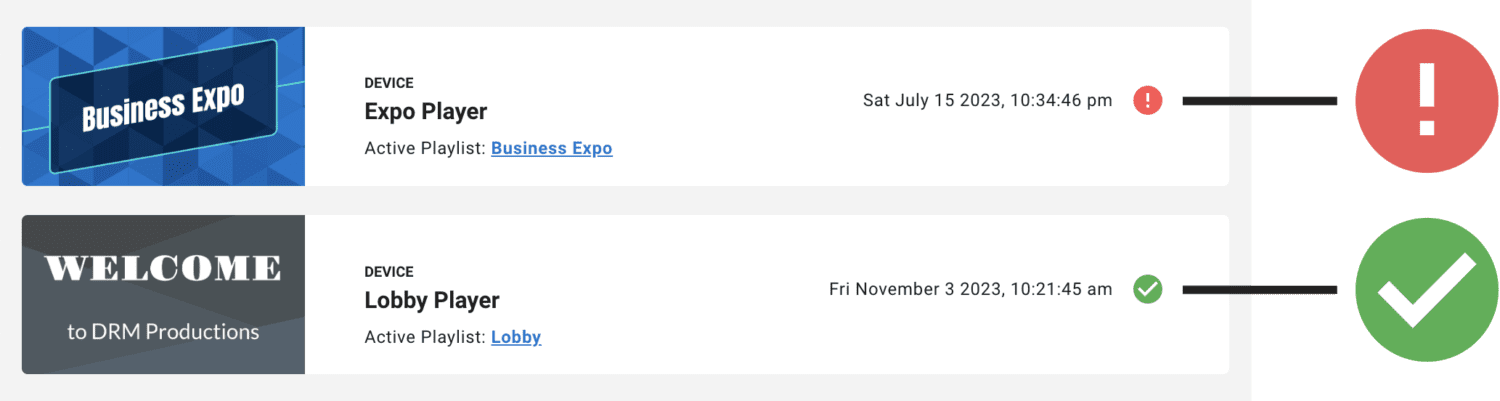
A green check mark means that the device has been online in the last 24 hours. A red warning means it has not.
That’s it!
Congratulations! Your new Retriever is ready to go. Now you can start communicating with your customers, employees, and more in an effective and entertaining way.
If you have trouble connecting your Retriever or you need any additional help, please call 888-817-2817 or visit our support page.
Troubleshooting
Common fixes
- HDMI — Make sure the HDMI cable is fully plugged in to the Retriever device and the TV.
- TV — Make sure the TV is plugged in, turned on, and on the correct HDMI input.
- Power — Make sure the device’s power cable is fully plugged in to the device and outlet.
- Offline — If your Retriever is offline (see step three), make sure the Wi-Fi dongle is fully plugged in to the Retriever device. Then follow the instructions for “Network Setup.”
Troubleshooting
Network setup
If the Wi-Fi screen doesn’t appear or you need to change Wi-Fi networks:
- While the Retriever is playing, press any button on the Retriever remote to open the “Debug Menu.”
- In the Debug Menu, select the Wi-Fi tab.
- Choose your network from the menu.
- Enter the password using the Retriever remote and onscreen keyboard.
- Press the back button “←” (not left “◀︎”) to close the menu. Then select “Close.”